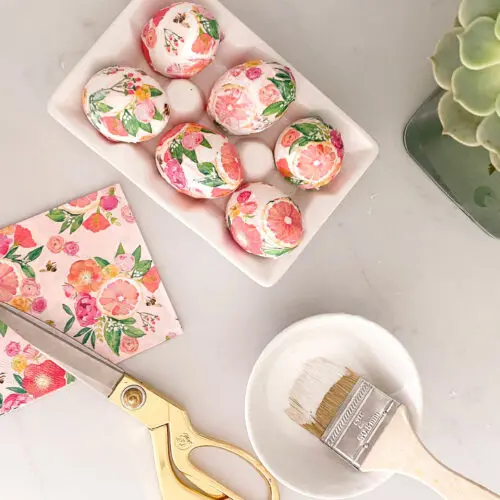
Get Creative Decorating Easter Eggs with Beautiful Paper Napkins My daughter reminded me just a few days before Easter that we forgot to decorate Easter eggs. My children are getting older and I really thought they had no interest. Well, I can assure you that my boys have no interest but my youngest daughter sure…
Search Results for: easter

Easter Spring Coastal Table
Soft Pinks and Greens Spring Colors Combined with Rattan Textures Create an Easter Spring Coastal Table Celebrate the arrival of spring with colors of soft pinks, greens and whites flowers to decorate your Easter table. Adding rattan and woven home decor items are elements that remind me of our coast living. I love rattan and…
Spring Easter Table
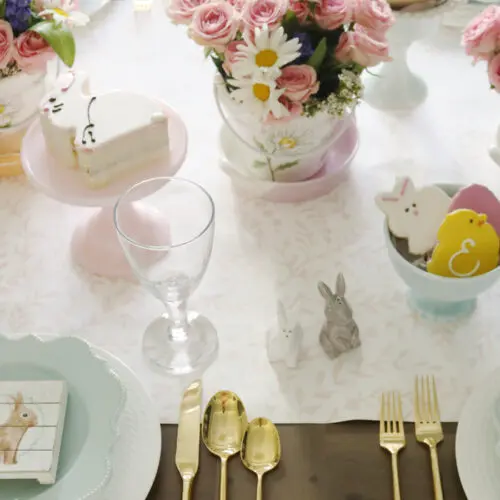
Playful Flowers and Cute Bunnies make a Happy Spring Easter Table After last year’s Easter, which was a complete wash, I am so eager to get back to having a traditional Easter Sunday this year! I missed our morning Easter brunch and opening up Easter baskets and congregating with friends in the early evening for…
Easter Dresses This Season
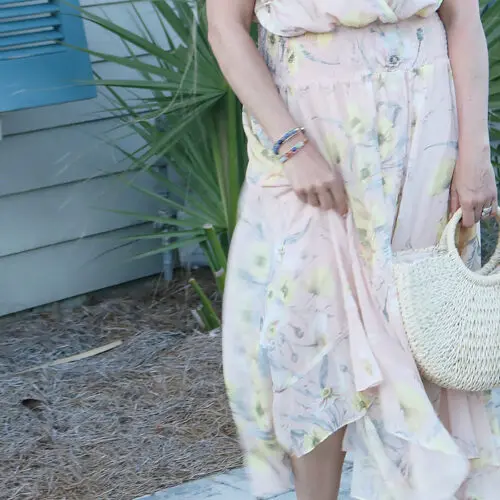
Our Top Picks for Easter Dresses This Season Easter is just around the corner! After last year of not having a traditional Easter Sunday, I am so eager to wear a pretty Easter dress and have our traditional Easter Sunday with an egg hunt and dinner! We love getting dressed up and usually my girls…
DIY Flower Easter egg
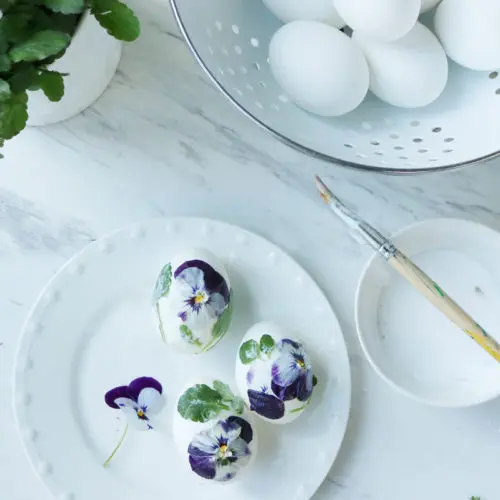
Decorate Your Easter Eggs this Year with Real Flowers and Foliage Since we are homebound this Easter season, I was trying to think of a way to decorate eggs for Easter without having to go out and buy a ton of supplies. This project is so fast to make and does not take up a…
