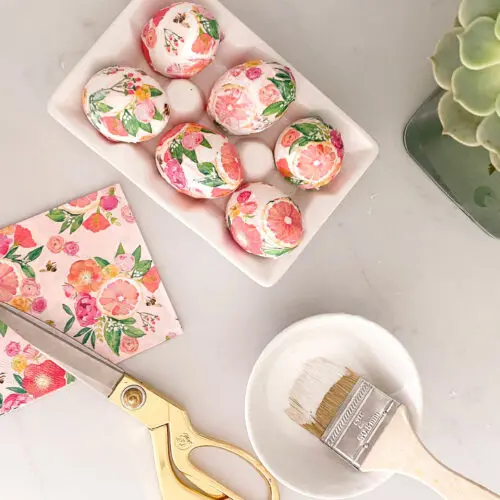
Get Creative Decorating Easter Eggs with Beautiful Paper Napkins My daughter reminded me just a few days before Easter that we forgot to decorate Easter eggs. My children are getting older and I really thought they had no interest. Well, I can assure you that my boys have no interest but my youngest daughter sure…
diy projects
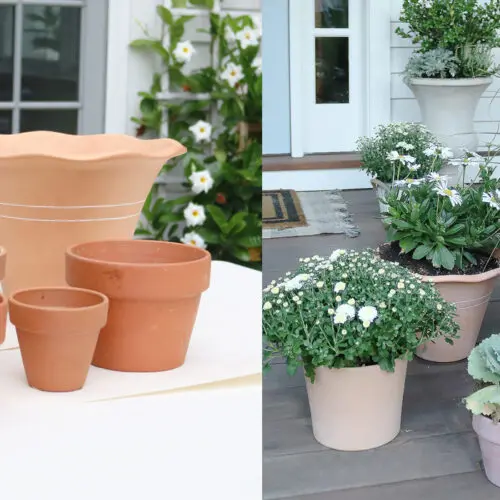
White Washed Terra Cotta Pots
Quick and Easy 10- Minute DIY White Washed Terra Cotta Pots Recently, I changed out my summer plants for fall plants, and I love the natural elements and neutral earth-tone colors from my plants down to my pots. Terra cotta pots are wonderful pots to use to bring in that natural and rustic look to…
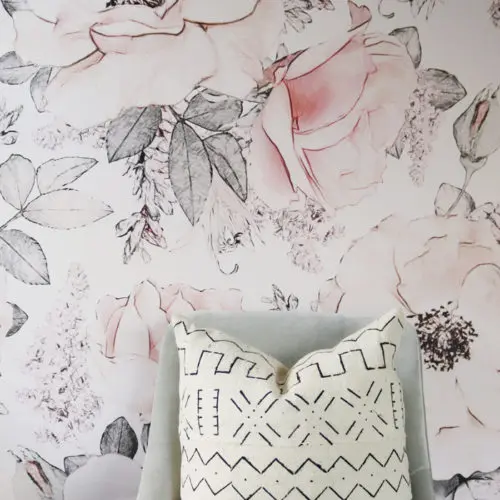
Traditional Wallpaper vs. Removable wallpaper
Tips on Choosing the Right Wallpaper for Your Wall I have applied both removable wallpaper and traditional wallpaper to different walls in different rooms in my home. And I always get the question from others–well, which one is better? That’s a good question! There are SO many different factors to put into question before you…
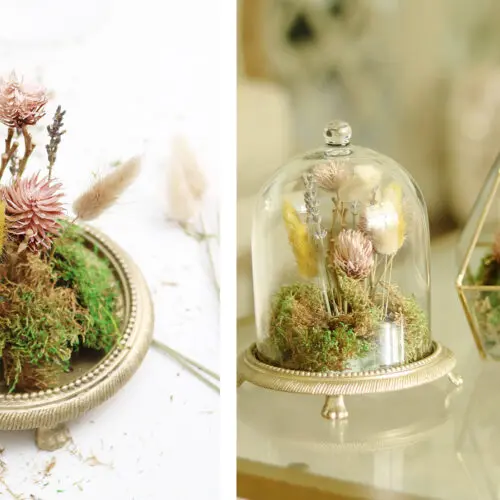
DIY Dried Floral Terrarium
The Perfect Fall Coffee Table Accent is this Dried Floral Terrarium Give me all the dried flower craft projects! I’m obsessed with how many beautiful projects you can make with dried flowers–wreaths, floral arrangements, garland and DIY dried floral terrarium. Of course! One of my favorite stores I love to go to to gather inspiration…
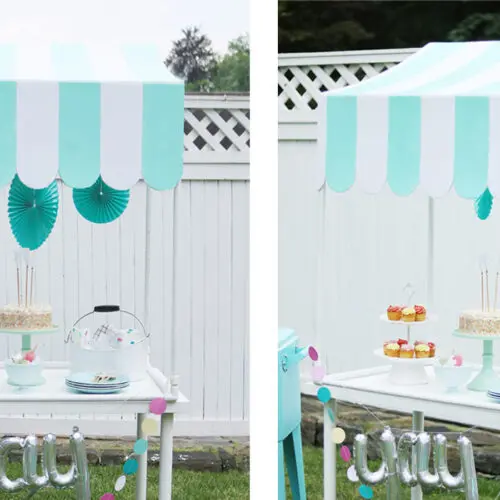
DIY Scallop Table Top Canopy
Make a party statement with this fun DIY scallop canopy that can be used for a lemonade stand, ice cream stand or birthday party! I haven’t done a party post in so long! I’m excited to post this DIY scallop table top canopy! This is a fun, easy and cheap DIY that can be used…
