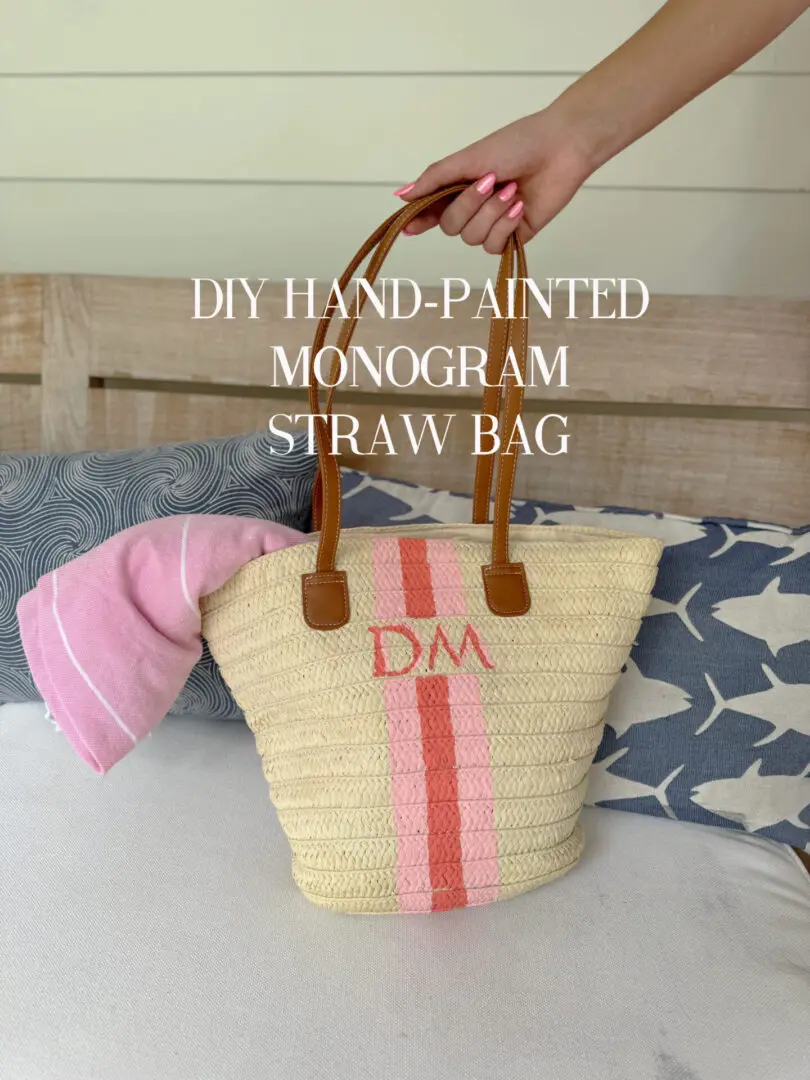
Easy Paint Craft Project to Personalize Your Summer Bag
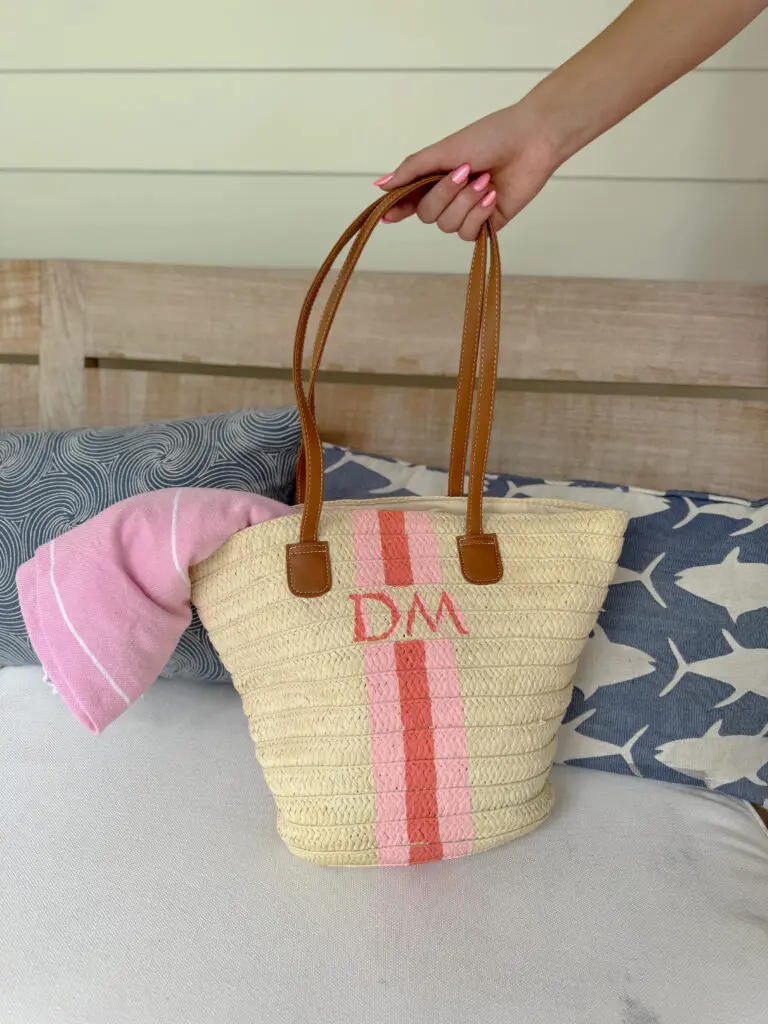
You know I always love a good summer crafting project! I have been wanting to make a DIY hand-painted monogram straw bag for so long after I saw a cute little shop at a local farmer’s market that was painting and selling hand-painted monogram straw bags. Although I love supporting small businesses, they were a pretty penny and I thought I could craft something similar. So glad I waited because this DIY hand-painted monogram straw bag is so easy to make and without the drying times, it will only take 20 minutes or less to make! There’s something timeless and effortlessly chic about a monogrammed straw bag. Whether you’re heading to the farmers market, packing up for the beach, or just running errands, a personalized straw tote adds just the right touch of style.
Before we jump to the post, check out these other summer projects:
- DIY Grasscloth Console Table
- DIY Terra Cotta White Washed Pots
- Backyard Playset Makeover
- DIY Table Top Scallop Canopy
Here’s how to make your own DIY hand-painted monogram straw bag at home. Make sure to also check out the Instagram video post for the complete breakdown!

Supplies
- A plain straw tote or basket bag. I used this straw bag.
- Acrylic paint (choose two colors — I used DecoArt Americana Coral Blush and Baby Pink.
- Painter’s tape or masking tape
- Small paint sponges (1 large flat and 1 fine detail brush)
- Stencil for your monogram (or freehand if you’re confident!)
- Paper plate or paint tray
- Optional: Sealant spray for extra durability
Instructions
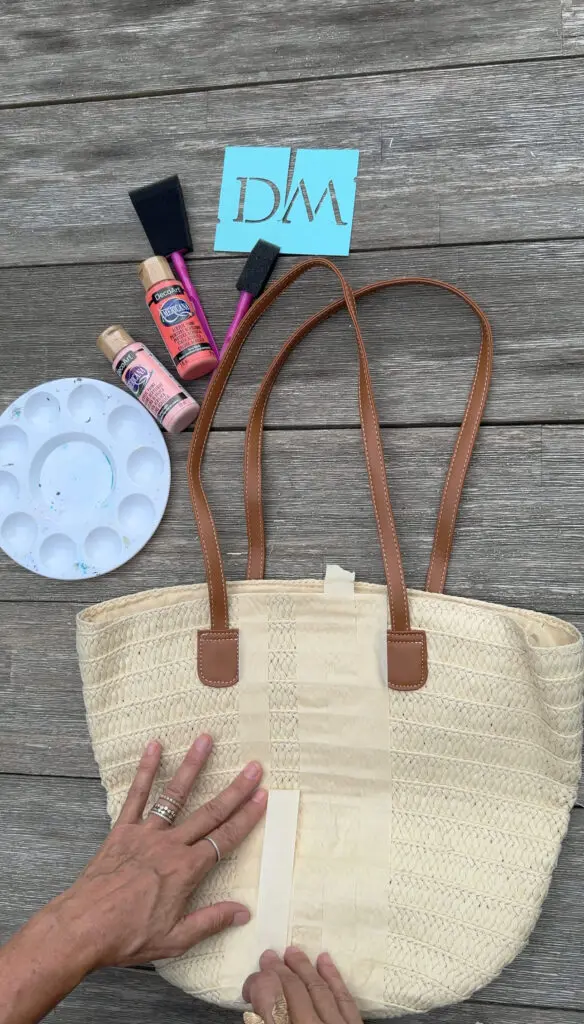
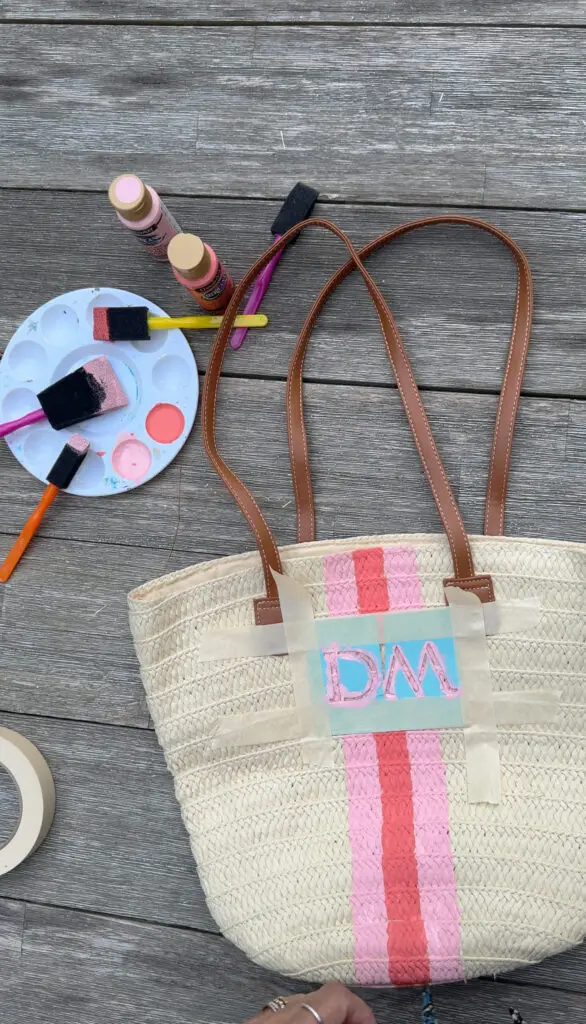
1. Plan & Tape Your Vertical Stripes
Using masking tape, you will where your three vertical stripes will go. Place your first masking tape down the middle of the bag. Next place your next masking tape right next to the middle masking tape all the way down the bag. Follow with another masking tape on the other side of the first masking tape. Keep each tape close together. You will have a total of four vertical tapes. Then you remove the two middle tapes that are flanked by tapes next to each other. Make sure to press down firmly to prevent bleeding
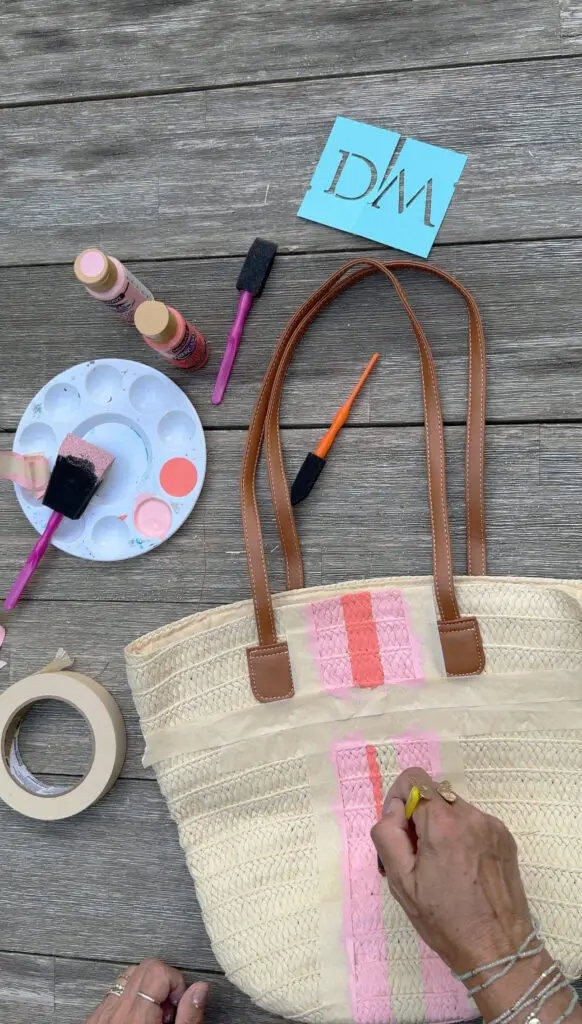
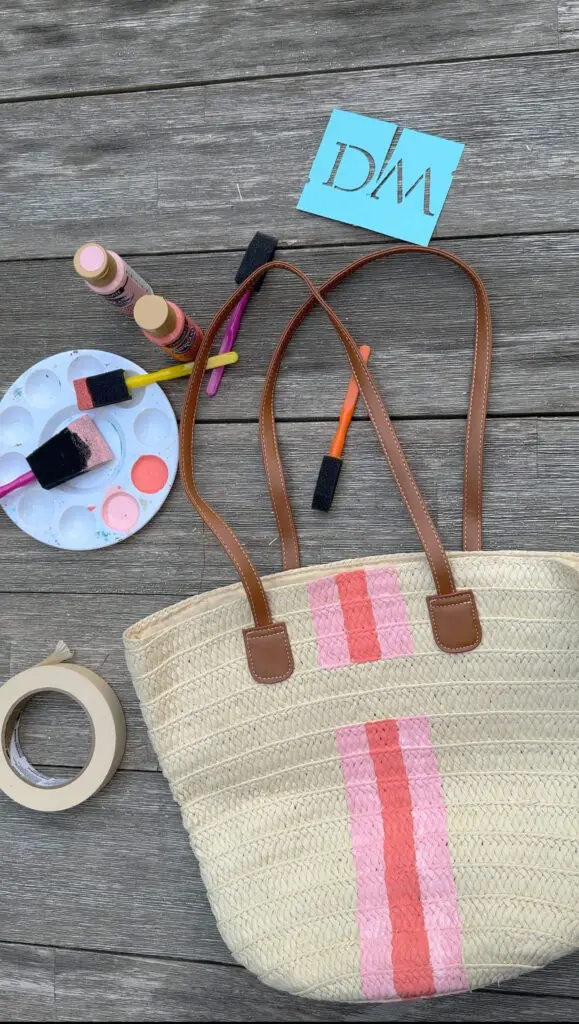
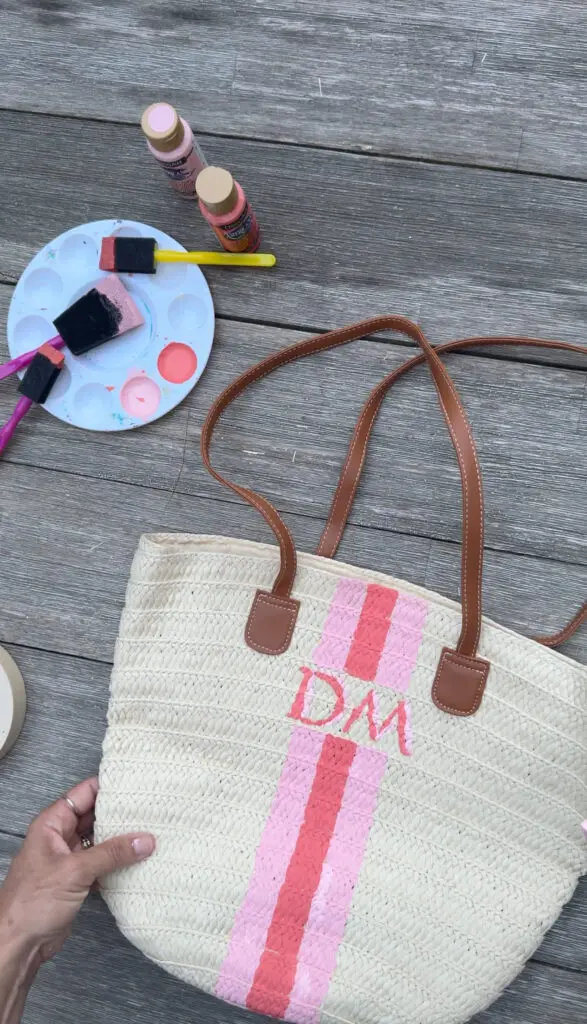
2. Paint the Stripes
Paint in between the tapes with your accent color. Let it dry. About 10 minutes. You should have two vertical stripes. You may need two coats depending on the texture of your straw bag. Next peel the middle tape that is separating the two vertical stripes. You will paint that area with your boldest color. You may need two coats depending on the texture of your straw bag. Let each stripe dry fully before peeling off the tape. The tape on the sides.
3. Add Your Monogram with a Drop Shadow
Choose where you’d like to place your initial(s) — either centered over the stripes or slightly offset or between the stripes like I did. Tape down the letter stencils so it doesn’t shift.
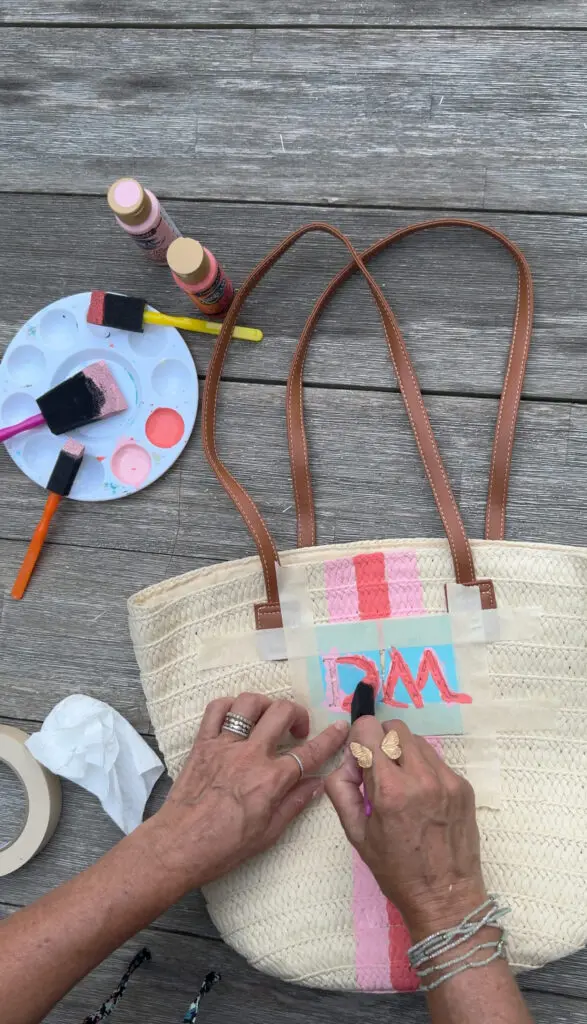
Start with your base letter color (usually the lightest color). Once that’s dry, use a fine detail brush to paint the drop shadow in a bold shade (usually the darker color) just slightly offset — typically down and to the right. Or what I did was place the monogram stencil over the letters and just off center them just a few millimeters and than paint. Then I went back and defined the drop shadow with extra paint.
Drop Shadow Tip: Think of the light source coming from the top-left — your shadow will go bottom-right. Keep it subtle for a classy finish.
4. Optional: Seal the Paint
To protect your bag from smudges, weather, or wear, apply a clear acrylic sealant spray over the painted area. Let it cure for 24 hours before use.

Looks so good!